Overview
Headless interaction is ideal for:
-
Backend integrations
-
Automated pipelines
-
External system orchestration
-
CI/CD workflows
-
Programmatic AI execution
Prerequisites
Before starting, ensure you have the following:
-
Agentic API Base URL
-
Data API URL
-
Headless APIs.postman_collection.json file
-
Workspace access with API invocation permissions
-
Postman installed locally
-
Valid Cortx user account
-
Permission to generate Personal Access Tokens
⚠ Ensure the provided API URLs do not include trailing slashes (/).
Step 1 — Import the Postman Collection
-
Open Postman
-
Click Import (top left corner)
-
Select the .json file
-
Click Import
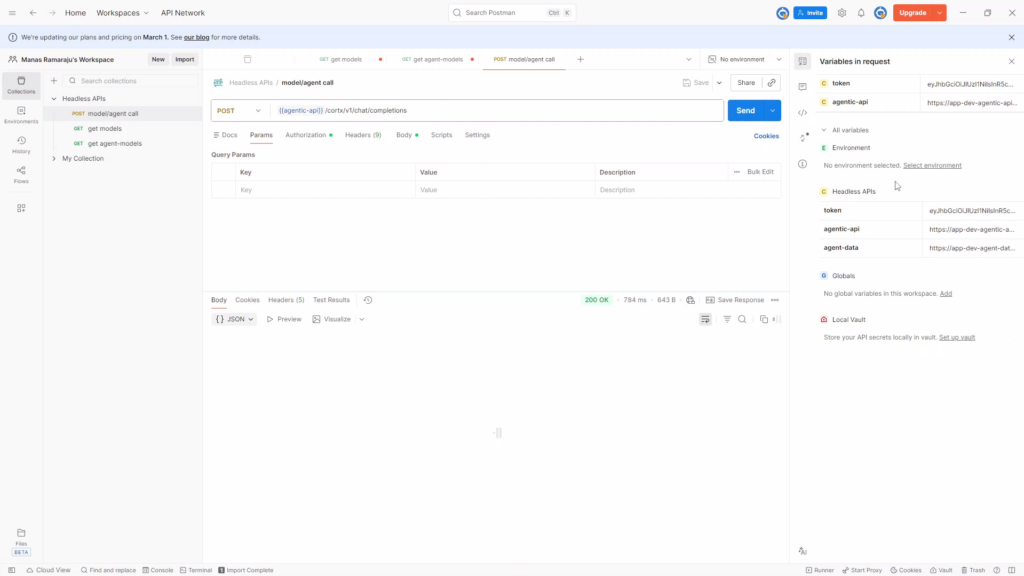
Step 2 — Configure Environment Variables
-
Click on any of the API requests.
-
In the request URL bar, you will see variables like: {{agentic-api}}
-
Hover over the variable.
-
Click Set as variable, or
-
Click the Variables tab at the bottom.
| Variable | Value |
|---|---|
| agentic-api | Paste the Agentic API Base URL |
| agent-data | Paste the Data API URL |
| token | To be filled (refer Step 3) |
Step 3 — Get Your Bearer Token
Headless access requires authentication via a Personal Access Token (PAT).
-
Log into Cortx
-
Click your User Profile (top right)
-
Select Settings
-
Navigate to Token Management
-
Click Create New Token
-
Enter:
-
Token Name
-
Expiration Date
-
-
Click Create
-
Copy the generated token securely
Paste Token into Postman
Return to Postman and paste the copied token value into the: Token field under the headless api’s variables section.
Step 4 — Run the API
If configured correctly:
-
The API executes successfully
-
A JSON response appears in the response panel below
Step 5 — Customize Your Prompt
To modify the query being sent:
-
Navigate to the Body tab
-
Locate the content field
-
Replace the placeholder text with your own prompt
{
“model”: “gpt-oss-120B”,
“messages”: [
{
“role”: “user”,
“content”: “Explain inflation in simple terms.”
}
]
}
You should see a structured JSON response containing:
-
Model or Agent output
-
Generated content
-
Execution metadata (if applicable)
-
Click Send
-
Review the response in the lower panel
Example response snippet:
{
“content”: “Inflation is the rate at which prices increase over time…”
}
What Happens Behind the Scenes
When you click Send:
-
Request is sent to the Agentic API
-
Bearer token is validated
-
RBAC permissions are enforced
-
Model or Agent executes
-
Response is returned as structured JSON
-
Execution is logged under Observability
Troubleshooting
Before starting, ensure you have the following:
1. “detail not found”
Possible Causes:
-
Invalid or expired Bearer token
-
Incorrect API URL
-
Trailing slash in the URL
Resolution:
-
Verify token is valid and correctly pasted
-
Ensure URLs do not contain trailing slashes
-
Confirm correct environment variables are selected
2. “can’t find model”
Possible Cause:
-
Incorrect model name in request body
Resolution:
- Ensure the model name is exactly. Remove any typos or extra spaces.
Possible Cause:
-
Expired or invalid Bearer token
Resolution:
-
Log into Cortx
-
Navigate to Settings → Token Management
-
Generate a new token
-
Replace the token in Postman
-
Re-run the request
Best Practices
-
Do not expose tokens in frontend applications
-
Rotate tokens regularly
-
Use short expiration tokens for testing
-
Maintain environment separation (Dev / Prod)
-
Store tokens securely
-
Monitor API activity via Observability
Summary
Import Collection → Configure Variables → Generate Token → Run API → Customize Prompt → View Response