Overview
Steps
-
Click the user avatar → select Manage Workspace.
-
Navigate to Organizations → select your organization.
-
Open Access Management → Overview.
-
Select Identity Providers.
-
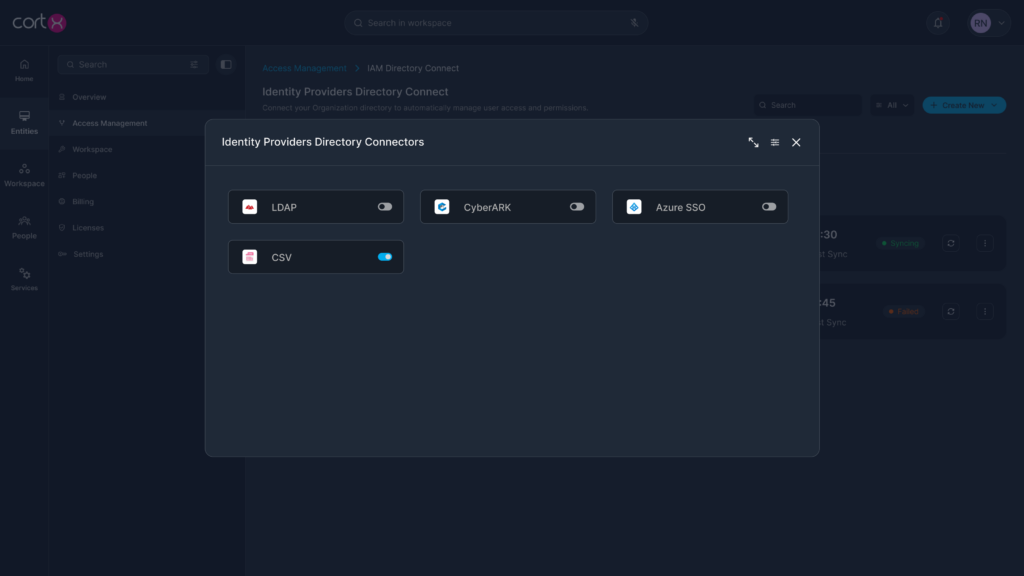
Click Create New.
-
Enable the required identity provider by turning on one of the available toggles:
-
LDAP
-
CyberArk
-
Azure SSO
-
CSV Import
-
Configuring Identity Providers
A. Directory-Based Identity Providers (LDAP, CyberArk, Azure SSO)
-
Turn on the required provider toggle.
-
Configure the necessary connection details such as:
-
Server details
-
Directory or DN details
-
Account or authentication details
-
-
Proceed to the User Group Mapping step.
-
Map external organization user groups to Cortx default User Groups:
-
Left side: Organization user groups (e.g., Infosec)
-
Right side: Dropdown listing Cortx default User Groups
-
-
Save the mappings to complete setup.
Once saved, all users from the mapped organization groups are imported into the corresponding Cortx User Groups.

B. CSV-Based User Import
-
Turn on the CSV Import toggle.
-
Upload a CSV file from the local device using the import area.
-
Refer to the sample CSV template provided to ensure correct formatting.
-
Preview the uploaded data.
-
On the mapping screen:
-
Left side: Organization user groups from the CSV
-
Right side: Cortx default User Groups
-
-
Map each organization group to the appropriate Cortx User Group.
-
Save to complete the import.
All users listed in the CSV are imported into the mapped Cortx User Groups.

How Access Is Applied After Import
-
Users imported through Identity Providers are added to Cortx User Groups.
-
Each User Group has Roles assigned to it.
-
Roles contain Permission Sets, which include Permissions.
-
Users automatically inherit access based on the User Group they belong to.
No manual permission assignment is required at the user level.
Managing Identity Providers
-
Enable or disable Identity Providers as needed.
-
Configure multiple Identity Providers for the same organization.
-
Update group mappings when organization structures change.
-
Re-import or sync users by updating provider configurations.
-
Manage imported users through the Users and User Groups sections.
Best Practices
-
Always map external user groups to Cortx User Groups for scalable access.
-
Keep group-to-group mappings aligned with organizational structure.
-
Validate mappings before completing large imports.
-
Use CSV import for controlled or one-time onboarding scenarios.
-
Avoid direct role assignment during onboarding unless required for exceptions.
Troubleshooting
Issue: Users are not visible after connecting an Identity Provider
Resolution: Verify that:
-
The identity provider toggle is enabled.
-
Configuration details are correctly provided.
-
The user data source (directory or CSV) follows the required format.
Issue: Users are imported but do not have access
Resolution: Verify:
-
External groups are correctly mapped to Cortx User Groups
-
Roles are assigned to the mapped Cortx User Groups
-
Permission Sets and Permissions are attached to the roles