This use case walks you through how to create a custom model in Cortx, configure its inputs and outputs, and then map it to a custom agent. This workflow is especially useful when you want to test and verify new models for specific industries or specialized tasks.
Step-by-step guide
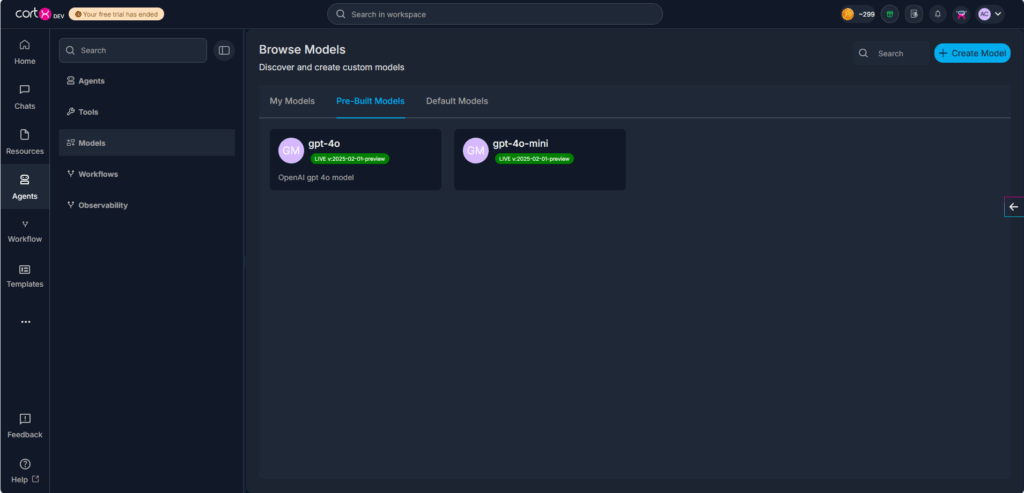
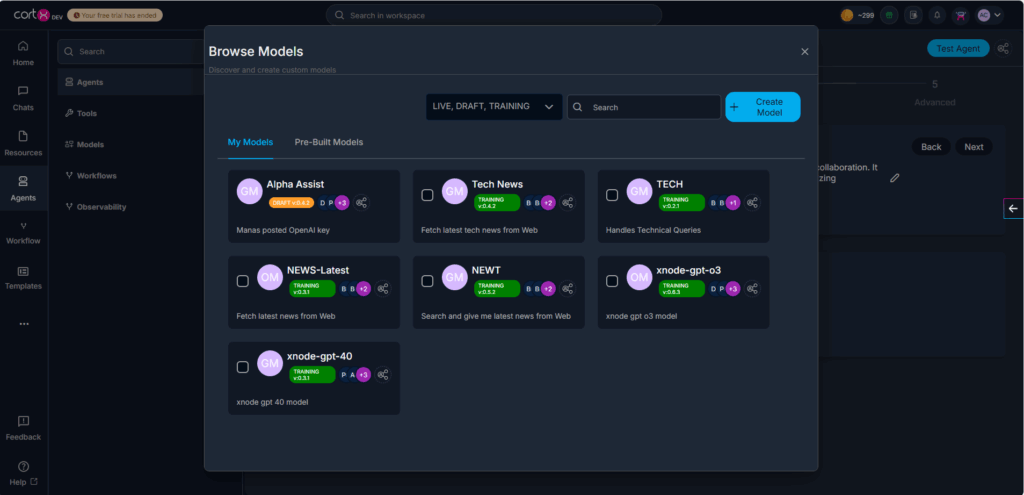
1. Navigate to Models
- Go to the Agents section from the left navigation.
- In the side blade, select Models.
- You will see three tabs:
- My Models – Displays all custom models you have created.
- Prebuilt Models – Ready-to-use models provided by Cortx.
- Default Models – System-level default models.
2. Create a Custom Model
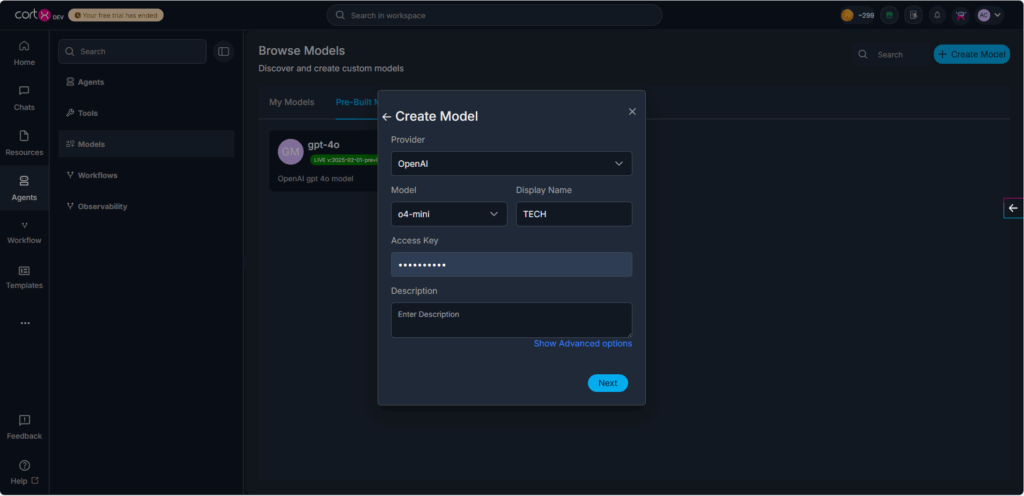
- Click Create Model in the top-right corner.
- A form will appear where you need to fill in details:
- Provider (dropdown) – Select from providers like Azure OpenAI, Groq, OpenAI, VLLM, nvidia, Bedrock, Deepseek, Anthropic, etc.
- Model – Choose from the provider’s available models (e.g., GPT-4.1, Nano-4.1, etc.).
- Display Name – The name you want to assign to the model.
- Access Key – Your authentication key for the model provider.
- Description – Briefly describe the model’s purpose.
- Click Next.
- Select Input/Output types by checking relevant boxes (Text, Image, Audio, Video).
- Configure Advanced Capabilities if required (Reasoning, Tool Calling, Parallel Tool Calls).
- Save the model:
- Save → Model is stored in Draft state.
- Test Model → Opens a new chat window for direct testing.
3. Publish the Model
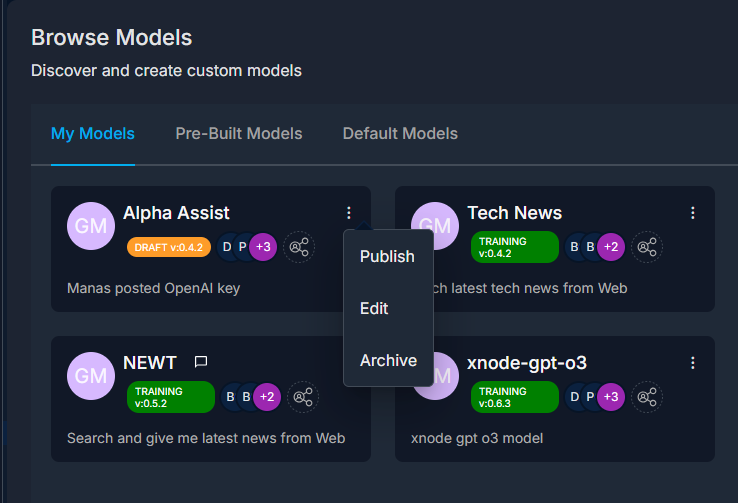
- Once tested, go back to My Models.
- Open the model’s 3-dot menu.
- Click Publish to make it available for agent mapping.
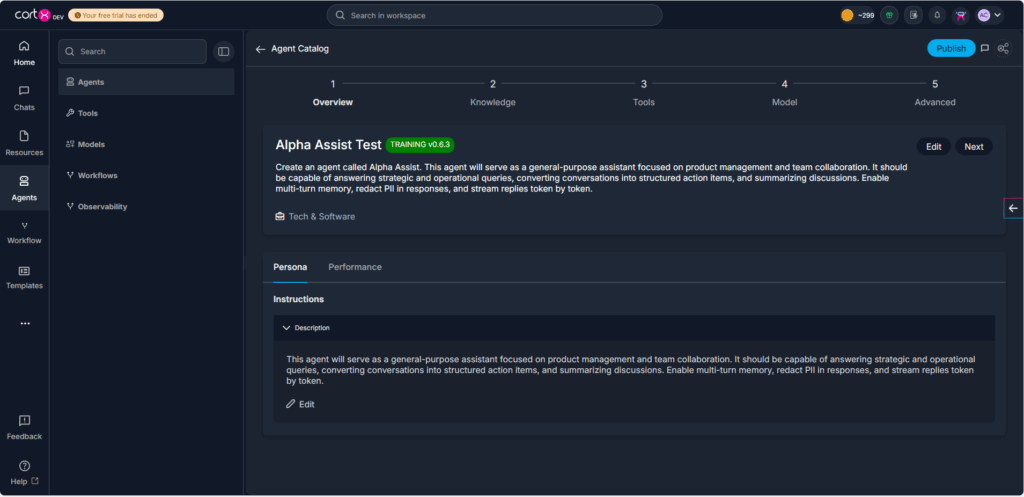
4. Create a Custom Agent
- From the left navigation, go to Agents.
- In the side blade, select Agents.
- Choose My Agents (for your custom ones) or Prebuilt Agents (Cortx-provided).
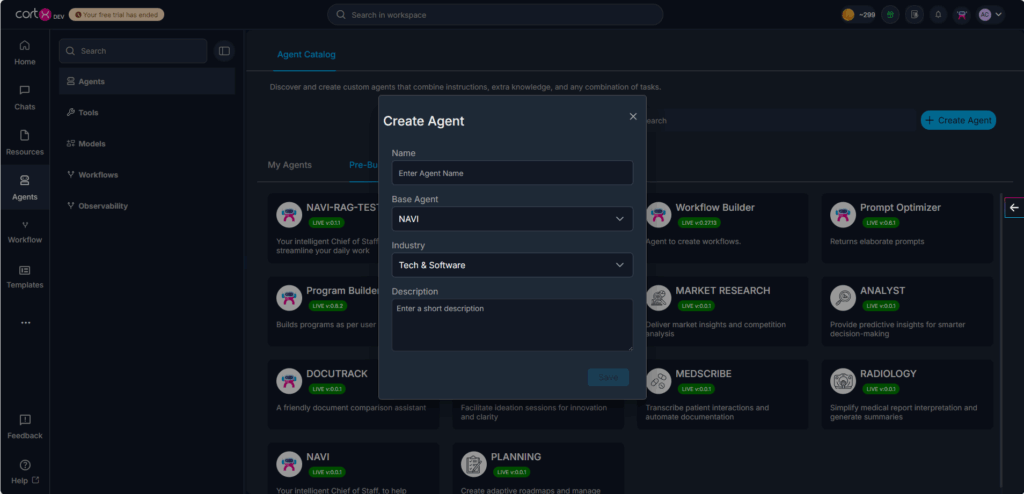
- Click Create Agent in the top-right corner.
- Fill in the form:
- Base Agent – Select a prebuilt agent as the foundation.
- Name – Title for the custom agent.
- Industry – Choose the domain or vertical.
- Description – Provide details about the agent’s function.
- Click Save. The agent will now appear in My Agents.
5. Configure the Agent
- Edit the agent persona:
- Description & Instructions – Add details about the agent’s goals and rules.
- Add Knowledge Sources – Select the types of knowledge the agent can access.
- Add Tools – Map the required tools for execution.
- Go to the Models section within the agent editor.
6. Map Custom Model to Agent
- In the Models tab, select your newly created model from My Models.
- Click Map Model to attach it to the agent.
- Save the configuration.
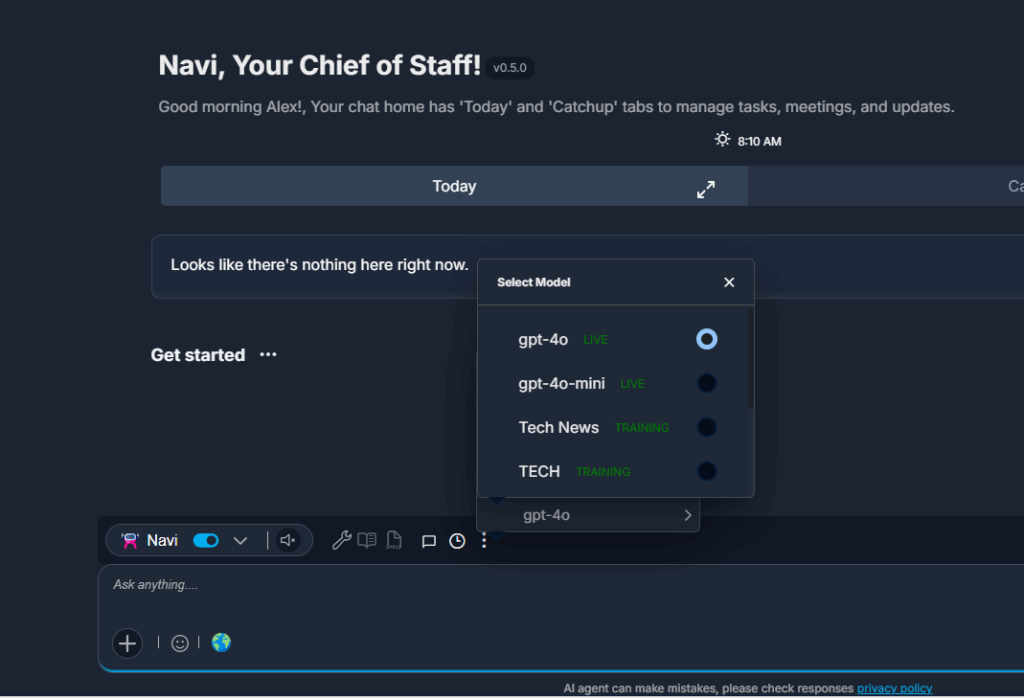
7. Test the Agent
- Open the agent in a new chat.
- Interact with it to validate responses.
- Use the 3-dot menu beside the agent tray to switch between models if needed.
- Experiment with different inputs and outputs to confirm the agent behaves as expected.
Best Practices
- Always test a custom model in draft state before publishing.
- Keep model descriptions and access keys updated for easy tracking.
- Use base agents aligned to your industry for better results.
- Verify outputs against real use cases before deploying agents to production.
✅ With these steps, you can create, verify, and deploy a custom model mapped to a custom agent in Cortx, giving you full control over specialized workflows.