Overview
-
Capture conversations and meetings from Microsoft Teams
-
Generate structured specifications from discussions
-
Export and sync documentation with SharePoint
-
Generate roadmaps, plans, and test cases
-
Sync execution artifacts with JIRA or Azure DevOps (ADO)
This workflow ensures continuity, traceability, and governance across the full lifecycle — from ideation to delivery.
Prerequisites
Before using this workflow, ensure the following are in place:
-
Microsoft Teams integration is enabled
-
The xnode Teams Agent is approved for use
-
The agent is added to relevant Teams channels or meetings
-
SharePoint integration is connected (if document export is required)
-
JIRA or Azure DevOps integration is configured
-
The user has appropriate workspace permissions
-
Workspace-level outbound sync controls are reviewed by an admin
Step 1: Capturing Conversations from Microsoft Teams
How the Teams Agent Works
Once added, the agent captures:
-
Messages and replies
-
Threads
-
File uploads
-
@agent commands
-
Meeting context and transcripts (where applicable)
Captured content is synced into Cortx as structured conversations, forming the foundation for downstream workflows.
Adding the Teams Agent to a Channel or Meeting
-
Open Microsoft Teams
-
Navigate to the required Team or Channel
-
Click View and Add Participants
-
Select Add Agents and Bots
-
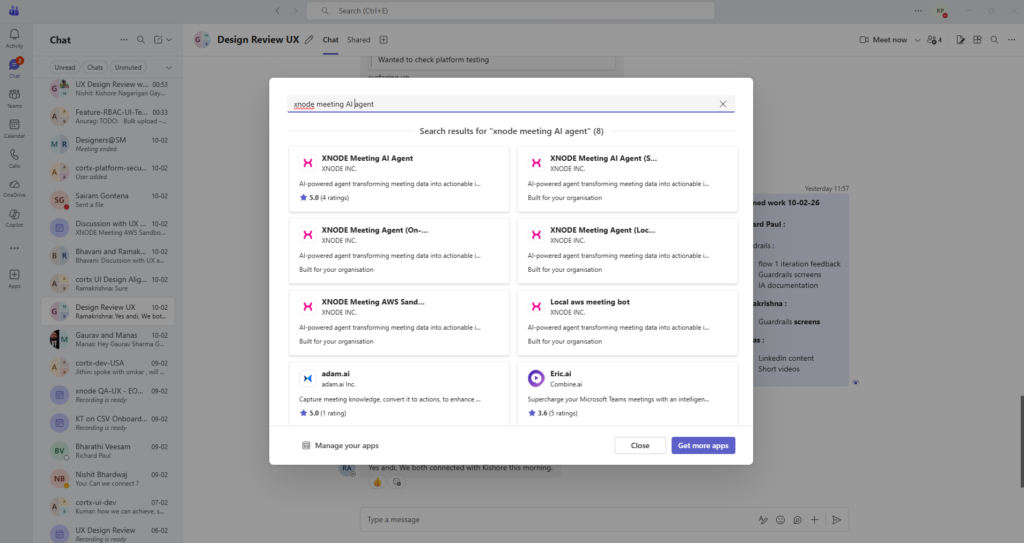
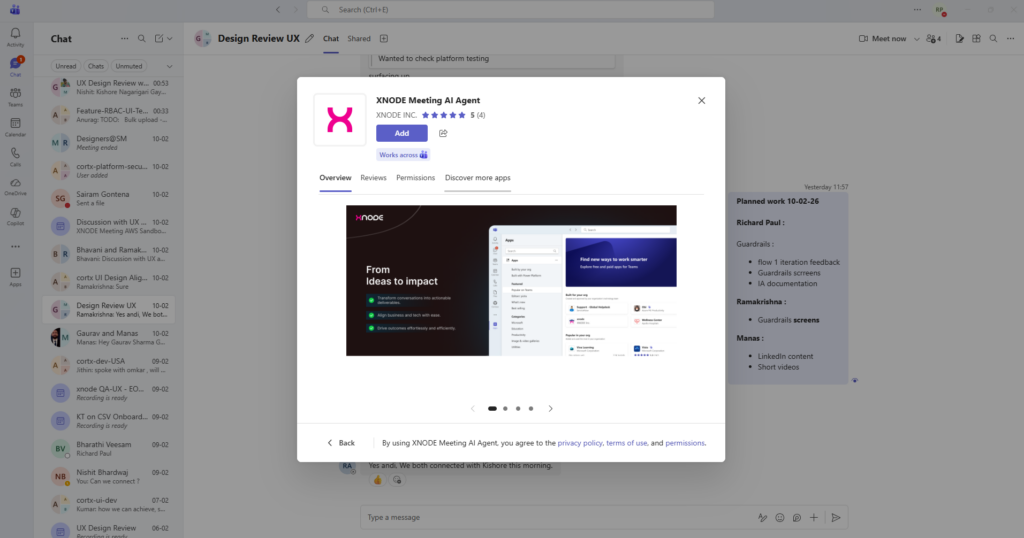
Search for xnode Meeting Agent
-
Click Add to Teams and approve permissions
-
Complete consent by authenticating with your company account
Once added, the agent begins monitoring conversations automatically.
Step 2: Generating a Specification from Conversations
Overview
What This Enables
-
Convert discussions into formal documentation
-
Use intelligent, reusable templates
-
Collaborate with stakeholders in real time
-
Maintain version history and auditability
-
Enable roadmap, plan, and test case generation
Step-by-Step: Generating a Specification
-
Open a synced conversation in Cortx
-
Click the three-dot menu
-
Select Generate Content
-
Choose a template:
-
Predefined templates (e.g., BRD 1, BRD 2, BRD 3)
-
Custom templates created at the workspace level
-
-
Select relevant conversation threads
-
Proceed to generate the specification
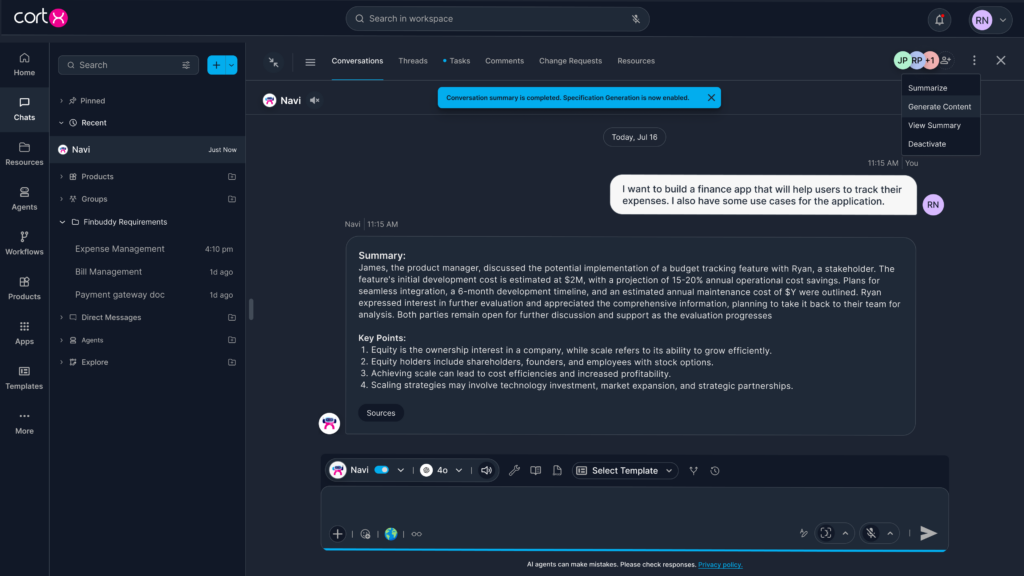
Generated Specification Content
The generated specification may include:
-
Executive summary
-
Stakeholder information
-
Project scope and timelines
-
Business drivers and dependencies
-
Current and proposed processes
-
Functional and non-functional requirements
-
User stories and technical considerations
-
Visual elements such as diagrams or tables (if applicable)
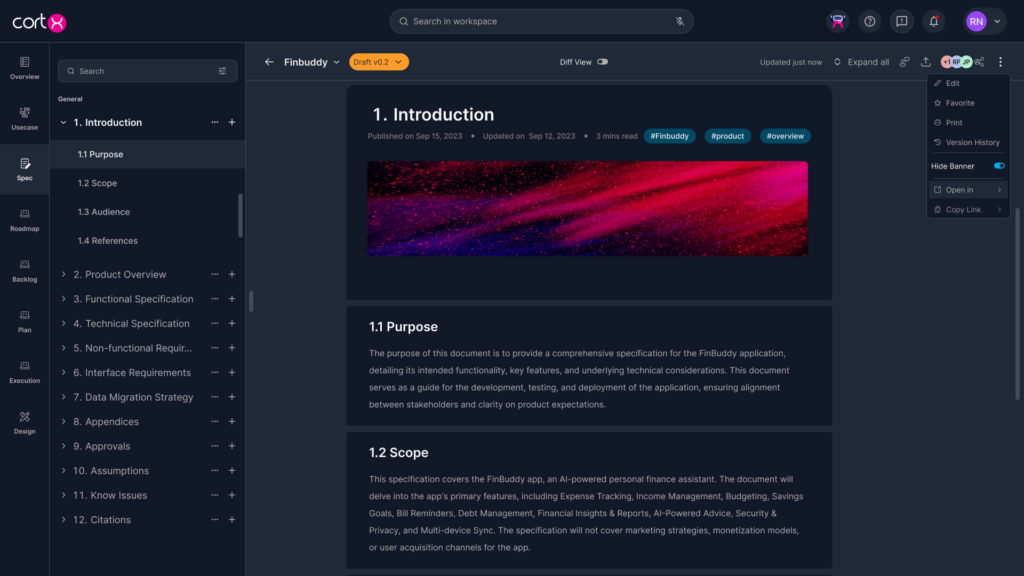
Editing and Versioning
-
All sections are editable
-
Users can add comments and @mentions
-
Every edit creates a new version automatically
-
Version history is available in:
-
Inline view
-
Side-by-side comparison view
-
Step 3: Exporting and Syncing Specifications with SharePoint
Overview
What This Enables
-
Export Cortx documents (Specs, BRDs, Proposals) to SharePoint
-
Maintain structured folder mappings
-
Detect changes across both platforms
-
Support enterprise compliance and audit needs
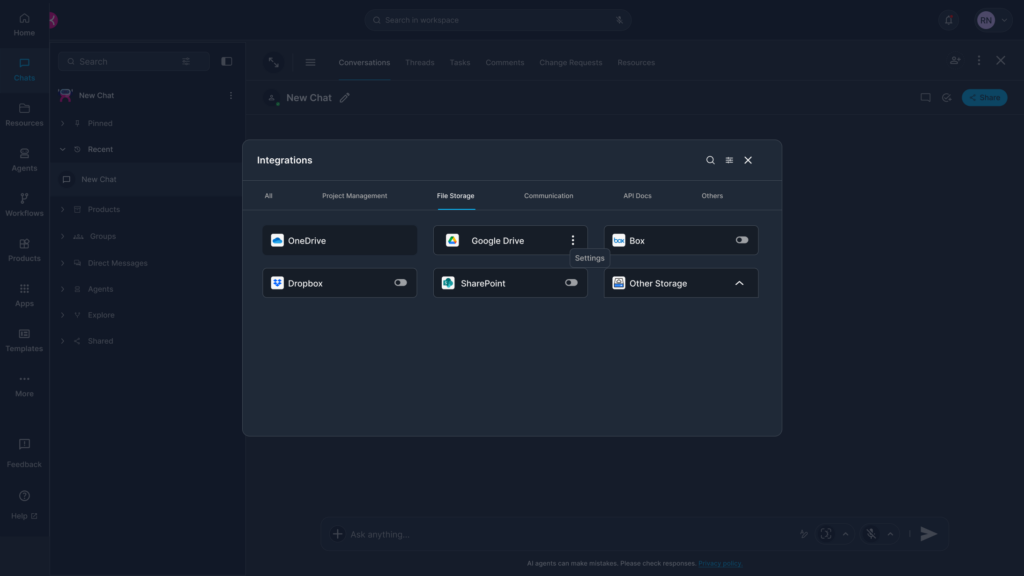
Connecting SharePoint to Cortx
-
Go to Integrations → Storage in Cortx
-
Enable SharePoint Toggle
-
Authenticate using Microsoft 365 admin credentials
-
Map Root folders within SharePoint
-
Save folder mappings for reuse
Exporting a Specification to SharePoint
-
Open a finalized specification in Cortx
-
Click Export → Export to SharePoint
-
Select the target SharePoint folder
-
The document is exported as a Word file
-
The export action is logged in Cortx version history
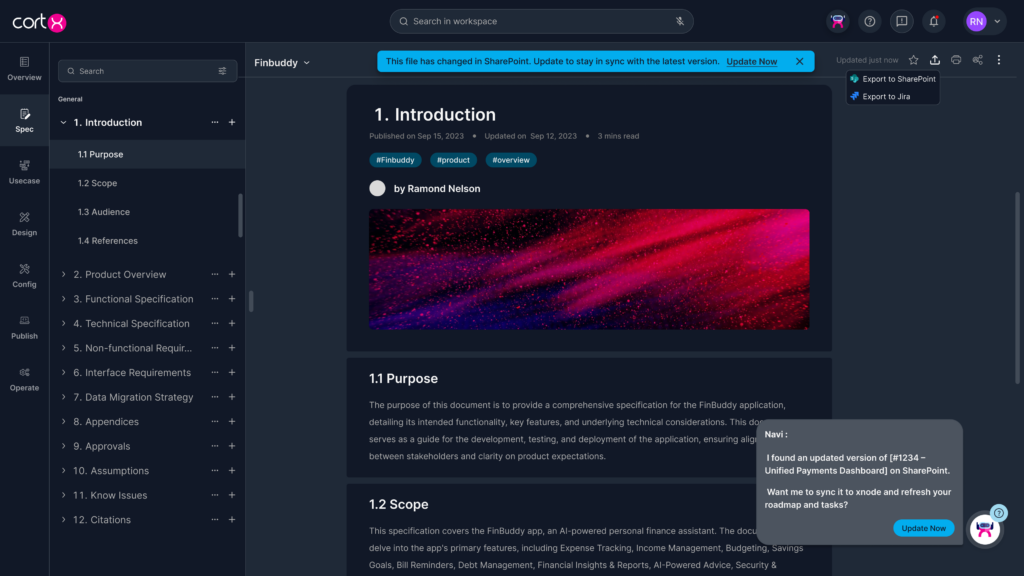
Bi-Directional Sync Behavior
-
Cortx detects changes made after the last sync
-
Users are prompted to push or pull updates
-
Sync prompts prevent accidental overwrites
-
Full traceability is maintained across Cortx and SharePoint
Step 4: Generating a Roadmap from the Specification
Overview
What This Enables
-
Automatic breakdown into Epics, Features, and User Stories
-
Visual planning hierarchy and structure
-
Traceability back to specification sections
-
Readiness for execution tool sync
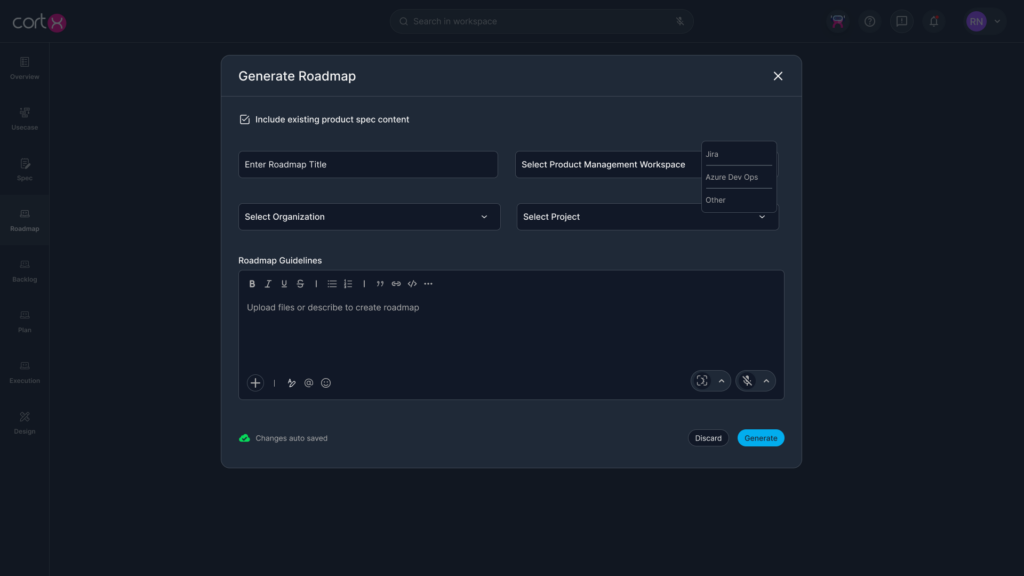
Step-by-Step: Generating a Roadmap
-
Navigate to Products in Cortx
-
Select the relevant product
-
Open Roadmap
-
Click Generate Roadmap
-
Complete the Roadmap Generator form:
-
Roadmap Title
-
Project Management Workspace
-
Organization
-
Project
-
-
Click Generate
Roadmap Structure
The generated roadmap includes:
-
Epics – high-level themes or modules
-
Features – functional components
-
User Stories – executable work items
Each item maintains a link to the section of the specification it was derived from.
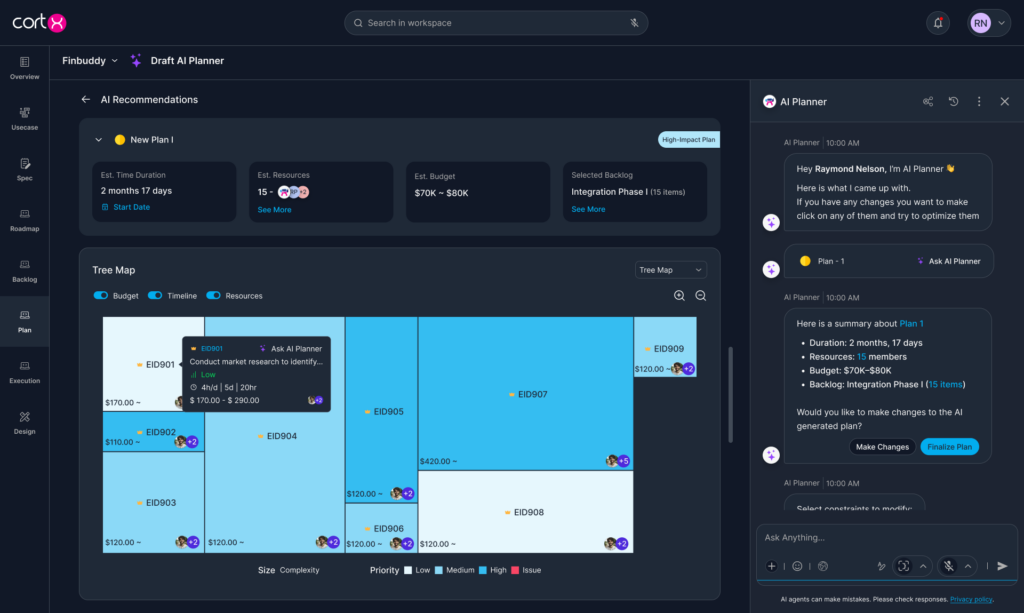
Step 5: Generating Plans and Test Cases
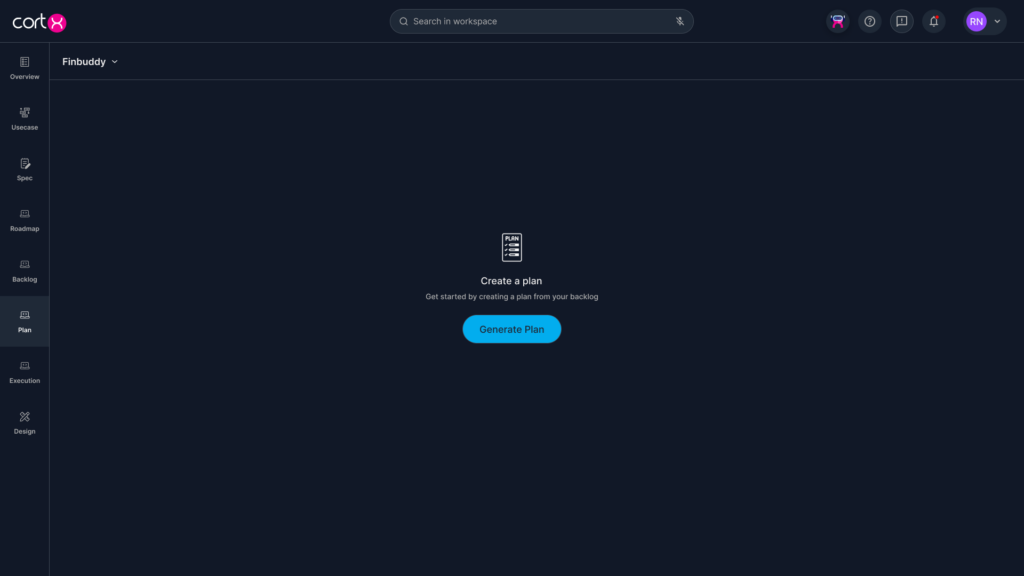
Plan Generation
Cortx generates execution plans from a roadmap or specification, allowing teams to compare delivery options before execution.
-
Open a Roadmap or Specification
-
Click Generate Plan
-
Cortx generates a structured execution plan
Use the chips at the top to switch between planning strategies:
-
Budget-Friendly
-
Resource-Friendly
-
Timeline-Friendly
Each selection recalculates the plan instantly.
Plans can be viewed as:
-
Tree View (epics → stories)
-
Heat Map (load and risk)
-
Charts & Graphs (effort and timelines)
Views update automatically when preferences change.
Cortx estimates:
-
Resource count
-
Effort distribution
-
Capacity risks
Test Case Generation
Cortx enables test case generation directly, by navigating to testcases and clicking on generate testcases
Generated test cases:
-
Align with functional and non-functional requirements
-
Maintain traceability to source documentation
-
Can be reviewed, edited, and versioned before execution
Step 6: Syncing with JIRA or Azure DevOps (ADO)
Overview
Once roadmaps, plans, or test cases are generated, Cortx allows users to sync these artifacts with JIRA or Azure DevOps (ADO).
What This Enables
-
Push Epics, Features, and User Stories to JIRA or ADO
-
Maintain a single source of truth for requirements
-
Enable bi-directional updates
-
Reduce manual ticket creation
Step-by-Step: Syncing Execution Artifacts
-
Open a generated Roadmap in Cortx
-
Select Sync to Project Management Tool
-
Choose JIRA or Azure DevOps
-
Map Cortx items to:
-
Organization
-
Project
-
Boards / Areas
-
Issue or Work Item types
-
-
Review the mapping preview
-
Click Sync to proceed
Sync Behavior
-
Epics, Features, and User Stories are created as work items
-
External IDs (JIRA keys or ADO IDs) are stored in Cortx
-
Deep links are maintained between systems
-
Status updates can be reflected back into Cortx
-
Sync activity is logged for audit and traceability
Syncing Plans and Test Cases
-
Plans can be synced as epics, features, or sprint-level items
-
Test cases can be synced to:
-
JIRA (via supported test management extensions)
-
Azure DevOps Test Plans
-
-
Test cases retain links to their source requirements
Workspace-Level Admin Controls
-
Workspace Admins can restrict outbound data flow
-
Teams → Cortx sync always continues
-
Cortx → external tool sync can be controlled
-
Only Workspace Admins can modify integration behavior
Best Practices
-
Complete discussions before generating specifications
-
Finalize specs before exporting or generating roadmaps
-
Review generated artifacts before syncing to execution tools
-
Assign clear ownership to specs, plans, and roadmaps
-
Use versioning instead of overwriting content
-
Respond promptly to sync prompts to keep systems aligned